 how-to
7 Curved Glazing Design Steps for Complex Facades
Last Updated: October 26, 2026
Quick Summary
Curved glazing design is the process of translating an architect's curved or faceted form into glass panels, structural support, tolerances and shop drawings that can be fabricated, installed and certified. It is a documentation discipline as much as an aesthetic one, and it starts with confirming achievable curvature in concept design.
- Test whether the form is single-curved or doubly curved, and whether it can be faceted or cold-bent instead of hot-bent.
- Specify the glass build-up in concept design, because it determines minimum radius, maximum panel size and weight.
- Agree curved glazing tolerances before shop drawings are produced, not negotiated after.
- Hot-bent glass allows tighter radii and compound shapes but costs more and takes longer than cold-bent.
- Plan spare panels, cleaning access and a repair strategy that avoids removing adjacent panels.
Table of Contents
- Why Complex Curved Glazing Fails Before It Reaches Site
- Step 1: Confirm Design Intent and Achievable Curvature
- Step 2: Select Glass Build-Ups and Safety Requirements
- Step 3: Set Curved Glazing Tolerances Before Detailing
- Step 4: Understand Curved Glass Fabrication Limits
- Step 5: Produce Curved Glazing Shop Drawings That Survive Site
- Step 6: Coordinate Structural Support, Lifting and Installation Access
- Step 7: Plan Maintenance, Repair and Lifecycle Costs
- Frequently Asked Questions
Why Complex Curved Glazing Fails Before It Reaches Site
Most curved facade failures begin months before a single panel arrives on site. For the compliance and wind-load requirements behind these early failures, see structural compliance for complex facade designs.
Curved glazing design is the process of translating an architect's curved or faceted form into glass panels, structural support, tolerances and shop drawings that can be fabricated, installed and certified. It is a documentation discipline as much as an aesthetic one.
The problem is coordination, not ambition. Curved glass design involves considering curvature, build-up, tolerances and access. When they are not, the result is RFIs, remade panels and programme slippage.
Below, we walk through each step in sequence, from confirming design intent to planning lifecycle costs.
Step 1: Confirm Design Intent and Achievable Curvature
Start by testing the design intent against achievable curvature. A radius that looks graceful on screen can be impossible to bend in a laminated build-up, or so tight it doubles the panel count.
Ask three questions before detailing anything:
- Is the form single-curved or doubly curved?
- What is the tightest radius, and over what panel size?
- Can the curve be faceted or cold-bent instead of hot-bent?
That last question matters most. Glass on Web's comparison of single-corner and free-form cold bending shows how cold-bending planar glass to a supporting structure can avoid costly hot-bent glass or a redesign. We recommend resolving this in concept design, not at tender.
Step 2: Select Glass Build-Ups and Safety Requirements
Glass build-up selection drives everything downstream: weight, bending limits, thermal performance, acoustic performance and cost. On curved work it also constrains geometry, because not every make-up can be bent to every radius. Get it wrong and the whole facade budget shifts.
The main choices, and where each earns its place on a curved facade:
- Toughened glass, high strength and thermal shock resistance, and the default where the panel must span or resist wind load. It cannot be cut or drilled after toughening, so all fabrication must be complete before bending and toughening. Toughening a curved panel is possible but tightens the achievable radius and adds cost.
- Laminated glass, two or more glass plies bonded with an interlayer. It holds together after breakage, which is why it is used for overhead glazing, balustrades, pool fencing and any location where fall-through or falling glass is a risk. Laminating a curved panel is more forgiving than toughening, but the interlayer and autoclave process limit minimum radius and maximum panel size.
- Insulated glazing units (IGUs), two glass panes separated by a sealed cavity for thermal and acoustic performance. Curved IGUs are feasible but the spacer system and seal must follow the curve, and the unit is heavier and more expensive than a single pane. Doubly curved IGUs are at the edge of what most fabricators will attempt.
- Triple glazing, three panes and two cavities where thermal or acoustic targets demand it. On curved work the added weight and thickness compound lifting and fixing demands, so confirm the fabricator can bend the full make-up before committing.
Safety requirements follow the application, not the aesthetics. Balustrades, pool fencing, overhead glazing and areas subject to human impact carry stricter requirements than a shaded shopfront.
Thermal and acoustic performance also shape the build-up. A curved IGU may be needed to meet NCC energy provisions, while a laminated make-up may be needed for acoustic separation on a busy road. Each requirement narrows the feasible build-ups, and each build-up narrows the achievable curvature.
| Build-up | Best for | Curvature impact | Watch-outs |
|---|---|---|---|
| Toughened | Strength, wind load, thermal shock | Tightens minimum radius; cannot be cut after toughening | All fabrication before toughening |
| Laminated | Safety, overhead, balustrades, pool fencing | Interlayer and autoclave limit radius and size | Heavier than single pane; edge quality matters |
| IGU | Thermal and acoustic performance | Spacer and seal must follow curve; heavier | Doubly curved IGUs at edge of feasibility |
| Triple glazed | High thermal or acoustic targets | Added thickness and weight compound lifting | Confirm fabricator can bend full make-up |
Step 3: Set Curved Glazing Tolerances Before Detailing
Curved glazing tolerances must be agreed before shop drawings are produced, not negotiated after. Bending introduces deviation in radius, chord, twist and edge alignment, and those deviations compound across a facade. On a flat facade a small deviation is invisible; on a curve it shows up as a kink in the sightline or a joint that opens and closes along the run.
The deviations come from identifiable mechanisms, and knowing them is how you set tolerances that are achievable rather than aspirational:
- Radius and chord deviation, the bent panel springs back slightly after forming, and the amount depends on glass thickness, build-up and bend method. Hot-bent panels hold radius more closely than cold-bent panels, which rely on the supporting structure to hold the curve and therefore inherit the structure's deviations.
- Twist and warp, doubly curved or twisted panels are the hardest to hold, because the glass must be formed in two directions at once. Twist tolerance is usually the tightest constraint on free-form work.
- Edge straightness and diagonal accuracy, bending can pull the panel out of square, which shows up as uneven joints at the corners. This matters most where curved panels meet flat runs.
- Optical distortion, curvature acts like a weak lens. Reflections of straight lines (building edges, poles, horizon) bend across the panel, and the effect worsens as radius tightens and panel size grows. This is a design constraint, not a defect, and it should be assessed on a mock-up before the specification is fixed.
Set and document tolerances for:
- Radius and chord length per panel
- Twist and warp across the panel face
- Edge straightness and diagonal accuracy
- Joint width and sightline consistency
- Roller-wave and anisotropy limits for toughened curved panels
Document them in the specification so the fabricator, contractor and installer work to one number. Where the project is subject to Australian building approval, the documentation should also show how the glazing complies with AS 1288 and the NCC, because a tolerance that cannot be verified on site is a compliance risk as well as an aesthetic one.
Dimensional accuracy is the difference between a facade that reads as a clean curve and one that shows every millimetre of variation at the joints. The earlier the tolerances are fixed, the more room the design team has to absorb them in the joint detail.
Step 4: Understand Curved Glass Fabrication Limits
Fabrication limits define what is buildable. Every bending method has a maximum size, minimum radius and practical tolerance, and those limits should shape the design, not fight it.
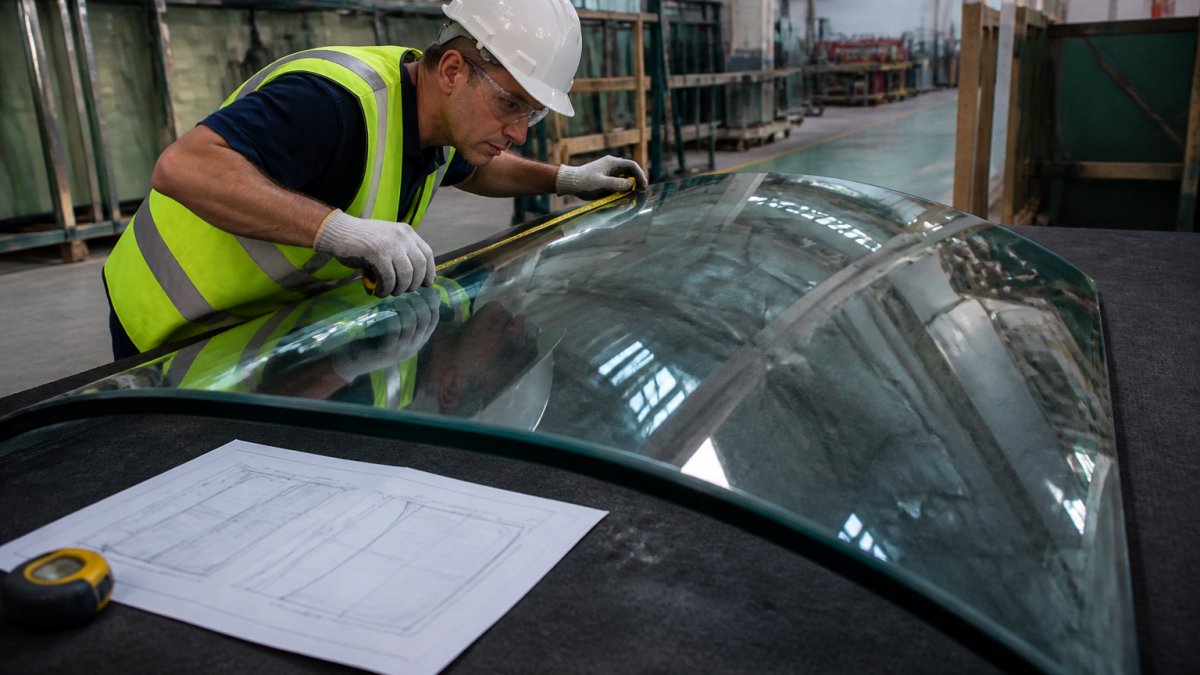
Hot-bent glass allows tighter radii and compound shapes but costs more and takes longer. Cold-bent glass uses planar panels fixed to a curved structure, which is cheaper and faster but limited by stress and reflection distortion. Glass on Web's explainer on computational design for cold-bent facades describes how the method works for doubly curved forms.
Panel size is the other lever. Larger panels mean fewer joints and cleaner lines, but they raise weight, lifting and handling demands. Match panel size to the crane and access you actually have.
Step 5: Produce Curved Glazing Shop Drawings That Survive Site
Curved glazing shop drawings are the documents that carry design intent to the factory floor and the site. They must show setout, sub-sill and subhead levels, fixing details, tolerances and panel identification clearly enough that nobody has to guess.
This is where most projects lose time. Before scheduling the work, check turnaround times for glazing shop drawings. Drawings that skip tolerance callouts or leave fixing interfaces vague generate RFIs and hold up fabrication. For deeper how-to guidance, see how to create facade shop drawings for curtain walls. Our facade and window shop drawings provide technical documentation for facade projects.
Step 6: Coordinate Structural Support, Lifting and Installation Access
Structural support, lifting and access are installation constraints that must be designed in, not solved on site. A curved panel that cannot be craned into position is a redesign waiting to happen.
Coordinate:
- Support framing and connection points for the curved geometry
- Crane positions, lifting points and panel weights
- Site access, laydown space and installation sequence
- Movement joints where the curve meets straight runs
On-site glazing of large curved panels leaves little room for error. Our facade engineering services can assist with engineering upon request.
Step 7: Plan Maintenance, Repair and Lifecycle Costs
Lifecycle planning is the step most projects skip, and it is where curved glazing quietly becomes expensive. Curved panels are harder to replace, clean and match than flat ones.
Plan for:
- Access for cleaning and inspection across the curve
- Spare panels and lead times for replacement
- Coating and seal longevity on exposed curved surfaces
- A repair strategy that does not require removing adjacent panels
Budget drivers on curved work are curvature, panel size, build-up complexity and access difficulty. Pricing depends on the project; contact BluePrint Facade for a quote rather than relying on early estimates.
| Step | Focus | Typical Owner | Why It Matters |
|---|---|---|---|
| 1 | Design intent and curvature | Architect | Confirms the form is buildable |
| 2 | Glass build-ups and safety | Specifier | Drives weight, cost and limits |
| 3 | Tolerances | Design team | Prevents joint and sightline issues |
| 4 | Fabrication limits | Fabricator | Defines what can be made |
| 5 | Shop drawings | Documentation lead | Carries intent to factory and site |
| 6 | Support, lifting, access | Contractor | Prevents on-site redesign |
| 7 | Maintenance and lifecycle | Owner | Controls long-term cost |
Frequently Asked Questions
What information is needed to design curved glazing?
The information needed depends on the project. Architectural intent, curvature, glass build-up, performance requirements, structural support, site access and lifting capacity are considerations for curved glazing design.
What should curved glazing shop drawings include?
Curved glazing shop drawings are technical documentation for facade projects. The specific information required depends on the project.
What is the difference between hot-bent and cold-bent glass?
Hot-bent glass is shaped in a furnace at high temperature, which allows tighter radii and compound curves. Cold-bent glass starts as flat laminated glass and is forced into a curve during installation using the supporting structure. Cold bending avoids costly hot-bent fabrication and architectural redesign in some cases, but it limits achievable curvature and puts stress on the laminate. The choice depends on radius, panel size and budget.
How do designers account for tolerances in curved glazing?
Designers set tolerances for radius, chord length, panel dimensions and edge alignment, then check them against fabrication capability and site conditions. Curved glazing tolerances must be stated on shop drawings so fabricators and installers work to the same limits. Allowances should cover thermal movement and structural deflection. Tolerances set too tight raise rejection rates and cost; set too loose, they cause visible misalignment and water ingress.
Complex curved facades fail on documentation and coordination far more often than on ambition. If your project needs drawings that hold up through fabrication and installation, BluePrint Facade produces precise facade and glazing shop drawings, including curved window design solutions and technical documentation for Alspec, Capral and Darley systems. Get started with BluePrint Facade and bring your curved facade from concept to site with drawings that survive the build.